
Welcome to the Lil’ Sew and Sew Instruction Manual! This guide helps you understand and operate your sewing machine effectively‚ whether you’re a novice or experienced sewer.
Discover key features‚ setup tips‚ and troubleshooting solutions to maximize your sewing experience with the Lil’ Sew and Sew machine.
Overview of the Lil’ Sew and Sew Sewing Machine
The Lil’ Sew and Sew sewing machine is a compact‚ user-friendly device designed for hobbyists and beginners; It offers portability and ease of use‚ making it ideal for small sewing projects. With its lightweight design‚ it is perfect for crafting‚ repairs‚ or teaching sewing basics. The machine supports straight stitch and zigzag stitching‚ allowing for versatility in creative projects. Its simple interface and minimal controls ensure a stress-free sewing experience. Whether you’re working on fabric‚ paper‚ or lightweight materials‚ the Lil’ Sew and Sew machine delivers reliable performance. This manual will guide you through its features‚ setup‚ and operation‚ ensuring you get the most out of your sewing machine.
Importance of the Instruction Manual
The instruction manual is essential for understanding and optimizing the use of your Lil’ Sew and Sew sewing machine. It provides clear‚ step-by-step guidance for setup‚ operation‚ and troubleshooting‚ ensuring you make the most of its features. Many users have reported difficulty finding manuals for specific models like the LSS-202 and LSS-505‚ underscoring the value of this resource. Without proper instructions‚ users may struggle with threading‚ stitch selection‚ and resolving common issues like thread breakage or fabric feeding problems. This manual addresses these challenges‚ offering detailed explanations and solutions. By following the guidelines‚ you can avoid frustrations and achieve professional-quality results. Whether you’re a beginner or an experienced sewer‚ the manual empowers you to use your machine confidently and effectively.
Key Features of the Lil’ Sew and Sew Sewing Machine
The Lil’ Sew and Sew sewing machine is known for its compact design and user-friendly interface‚ making it ideal for small projects and beginners. Models like the LSS-202 and LSS-505 feature two-speed settings‚ allowing for precise control over stitching. They also include essential stitch options‚ such as straight and zigzag stitches‚ which are versatile for various sewing tasks. The machine’s portability and lightweight construction enable easy transportation and storage. Additionally‚ it comes with a built-in thread cutter and a free-arm design‚ facilitating sewing cuffs and sleeves. These features make the Lil’ Sew and Sew a practical choice for crafting‚ repairs‚ and DIY projects. Its simplicity and affordability have made it a popular option among hobbyists and those looking to learn sewing basics.

Model-Specific Instructions
Find detailed guides forMichley LSS-202‚ LSS-505‚ and LSS-338 models‚ with manuals and videos available online for specific operation and troubleshooting tips.

Michley LSS-202 Lil Sew & Sew Mini 2-Speed Sewing Machine
The Michley LSS-202 is a compact‚ portable sewing machine designed for small projects. It features two sewing speeds and is ideal for beginners or casual sewers.
Users have reported difficulty finding the manual online‚ but it is available under the Sewing Machines category and has been rated by users. The machine supports basic stitching needs.
A quick start video for the LSS-505 model‚ also by Lil Sew & Sew‚ provides helpful guidance that may apply to the LSS-202. This resource can assist users in understanding machine operation.
For those who prefer visual learning‚ tutorials and online forums offer additional support. The LSS-202 is a practical choice for simple sewing tasks and DIY projects.
Michley LSS-505 Sewing Machine
The Michley LSS-505 is a versatile sewing machine designed for both beginners and experienced sewers. Its compact design makes it portable and easy to use for various projects.
Users can access the LSS-505 manual online‚ which provides detailed instructions for operation and maintenance. The manual has been rated by users and is available for free download.
A short video guide for the LSS-505 is also available‚ offering a quick start tutorial. This resource helps users familiarize themselves with the machine’s features and basic functions.
The LSS-505 supports a range of stitching options‚ making it suitable for sewing‚ repairing‚ and crafting. Its simplicity and reliability make it a popular choice for DIY enthusiasts.
For additional support‚ users can explore online forums and community resources‚ where tips and troubleshooting advice are shared by experienced sewers.
Michley LSS-338 Sewing Machine
The Michley LSS-338 Sewing Machine is a compact and user-friendly sewing machine designed for DIY enthusiasts and hobbyists. Its lightweight design makes it portable and easy to store.
While specific details about the LSS-338 are limited‚ it shares similarities with other Lil’ Sew and Sew models‚ offering basic stitching options for small sewing tasks and repairs.
Users have reported success with troubleshooting and maintenance by referencing online tutorials and community forums‚ where tips and solutions are shared by experienced sewers.
For the LSS-338‚ it’s recommended to use lightweight fabrics and standard thread sizes for optimal performance. Regular cleaning and proper threading are essential for smooth operation.
Although a dedicated manual for the LSS-338 is not widely available‚ users can benefit from general sewing machine guides and online resources to enhance their sewing experience.
This machine is ideal for small-scale projects‚ making it a great tool for beginners or those looking to practice their sewing skills without advanced features.
Setting Up Your Sewing Machine
Setting up your Lil’ Sew and Sew machine begins with unboxing and initial setup. Proper threading is essential for smooth operation; Bobbin installation ensures even stitching. Follow these steps to get started with your sewing projects.
Unboxing and Initial Setup

When you unbox your Lil’ Sew and Sew machine‚ carefully remove all components‚ including the sewing machine‚ power cord‚ accessories‚ and instruction manual. Place the machine on a stable‚ flat surface. Ensure the area is clean and free from clutter to prevent damage or interference. Inspect the machine for any visible damage or missing parts. Plug in the power cord‚ but avoid turning it on immediately. Familiarize yourself with the control panel and accessories provided. Read the manual thoroughly before proceeding to understand the machine’s functions and safety precautions. This initial setup ensures a smooth and safe sewing experience; Proper preparation is key to enjoying your Lil’ Sew and Sew machine for various projects. Take your time to organize your workspace and accessories for optimal convenience. Happy sewing!
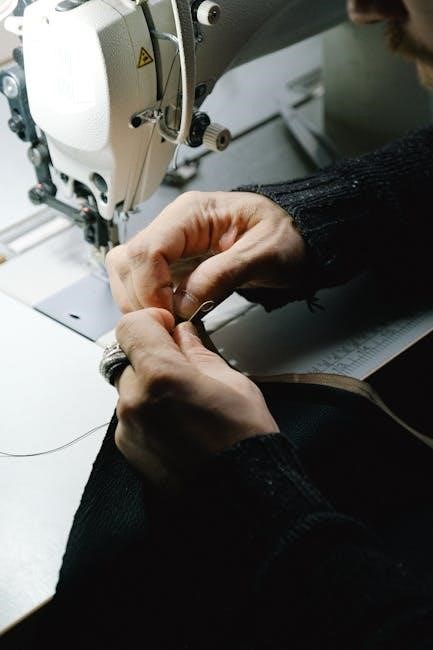
Threading the Machine
Properly threading your Lil’ Sew and Sew machine is essential for smooth operation. Begin by locating the spool pin on the top of the machine. Place the thread on the pin and gently pull it to ensure it’s securely held. Guide the thread through the tension discs‚ maintaining a slight tension to prevent tangles. Next‚ insert the thread into the take-up lever‚ ensuring it clicks into place. Continue threading through the machine’s guide and finally through the needle. Always follow the manual’s threading diagram to avoid mistakes. Keep the thread taut but not overly tight to maintain proper stitch formation. If threading proves challenging‚ consult the provided instructions or online guides for visual assistance. Proper threading ensures consistent stitching and prevents common issues like thread breakage or uneven fabric feeding.
Bobbin Installation
Installing the bobbin correctly is crucial for the proper functioning of your Lil’ Sew and Sew machine. Begin by lifting the presser foot to access the bobbin area. Locate the removable bobbin case‚ usually found under the machine’s stitch plate. Carefully remove the case and place the bobbin inside‚ ensuring the thread unwinds in the correct direction (as indicated by the machine’s markings). Gently pull the thread to ensure it is seated properly in the bobbin tension spring. Reinsert the bobbin case into the machine‚ making sure it clicks securely into place. Finally‚ pull the end of the thread to ensure it is properly engaged. Always refer to the manual’s diagram for precise guidance. Proper bobbin installation prevents issues like uneven stitching or thread tangling‚ ensuring smooth sewing operations. Regularly check the bobbin for damage or wear and replace it as needed.
Basic Sewing Operations
Mastering basic sewing operations on your Lil’ Sew and Sew machine involves controlling the speed‚ guiding fabric smoothly‚ and maintaining consistent tension. Practice these fundamentals to ensure precise stitching and professional results.
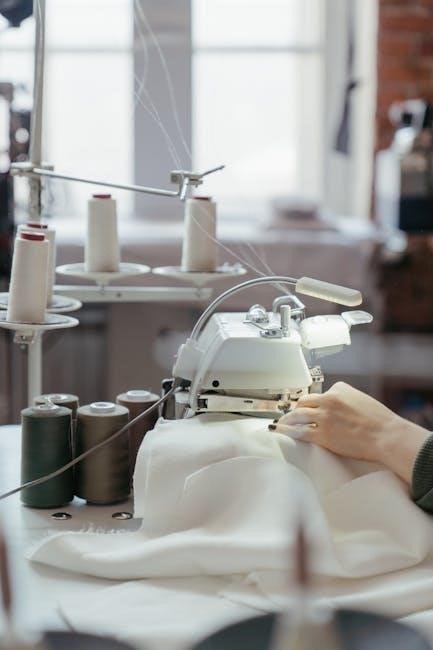
Straight Stitch Sewing
Straight stitch sewing is the most common operation on the Lil’ Sew and Sew machine. To begin‚ ensure the machine is set to the straight stitch option‚ typically indicated by a straight line on the stitch selector. Place your fabric under the presser foot‚ aligning the edge with the guide. Gently hold the fabric taut and start sewing at a steady pace. Maintain consistent tension by guiding the fabric smoothly‚ avoiding pulling or bunching. The straight stitch is ideal for sewing straight lines‚ repairing seams‚ and joining fabric edges; For best results‚ use the correct needle size and thread type. Practice on scrap fabric to master the technique. This stitch is versatile and forms the foundation for most sewing projects.
- Use the straight stitch for general sewing tasks.
- Keep fabric steady to ensure even stitching.
- Perfect for beginners and simple projects.
Zigzag Stitch Sewing
Zigzag stitch sewing is ideal for decorative stitching‚ finishing seams‚ and preventing fraying. On the Lil’ Sew and Sew machine‚ select the zigzag stitch option‚ usually marked with a zigzag pattern. Adjust the stitch width and length as needed for your fabric type. Place the fabric under the presser foot and start sewing‚ guiding it smoothly. The zigzag stitch is perfect for stretchy fabrics‚ as it allows for flexibility. Use it to add decorative edges or reinforce seams. For best results‚ use a universal needle and appropriate thread. Experiment with different stitch widths to achieve various effects. This stitch is versatile and adds a creative touch to your projects.
- Great for stretchy or delicate fabrics.
- Use for decorative edges or seam finishing.
- Adjust stitch width for desired effect.
Backstitching Techniques
Backstitching is essential for securing the start and end of your seams‚ ensuring durability. On the Lil’ Sew and Sew machine‚ backstitching is done by sewing a few reverse stitches at the beginning and end of your seam. Press the reverse stitch button or lever‚ then gently press the foot pedal to apply consistent pressure. Sew 2-3 reverse stitches‚ then release the button to return to forward stitching. This technique prevents unraveling and strengthens your work. Use a matching thread color to blend seamlessly with your fabric. Always backstitch when starting and ending seams‚ especially for straight-stitch and zigzag stitching projects. For thicker fabrics‚ you may need to adjust the presser foot pressure. Backstitching is a simple yet crucial step for professional-looking results.

- Press the reverse stitch button for secure starts and ends.
- Sew 2-3 reverse stitches for optimal seam strength.
- Use matching thread for a seamless finish.

Troubleshooting Common Issues
Troubleshooting common issues with Lil’ Sew and Sew involves checking machine settings‚ ensuring proper maintenance‚ and verifying power sources. Regular cleaning and oiling prevent malfunctions. Use correct materials.
- Check thread tension and bobbin alignment.
- Ensure proper power supply and cord connection.
- Refer to the manual for specific error solutions.
Machine Not Turning On
If your Lil’ Sew and Sew machine fails to turn on‚ start by checking the power source. Ensure the machine is properly plugged into a functioning outlet. Verify that the power cord is undamaged and securely connected to both the machine and the electrical outlet. If using a surge protector or extension cord‚ test the machine directly in the wall outlet to rule out issues with the intermediary devices.
- Check the power switch for proper function.
- Ensure all machine components are correctly assembled.
- Consult the user manual for specific troubleshooting steps.
- Contact customer support if the issue persists.
Thread Breakage
Thread breakage is a common issue that can disrupt your sewing process. To address this‚ first check the thread path for any tangles or knots. Ensure the thread is properly seated in the tension discs and that the take-up lever is in the correct position. If the thread is old or of poor quality‚ replace it with a high-quality‚ lint-free thread. Incorrect needle size or type can also cause breakage‚ so verify that you’re using the appropriate needle for your fabric. Additionally‚ ensure the bobbin is threaded correctly and that there are no blockages in the bobbin area. If the issue persists‚ consult the manual for specific guidance or adjust the tension settings as needed. Regular maintenance can help prevent frequent thread breakage.
Fabric Not Feeding Properly
Fabric not feeding properly can hinder your sewing progress. Start by ensuring the feed dogs are in the “up” position and free from debris. If they are damaged or clogged‚ clean or replace them as needed. Check the tension settings‚ as overly tight or loose fabric can cause feeding issues. Ensure the presser foot is correctly attached and suited for your fabric type. For heavy or thick fabrics‚ consider using a walking foot or Teflon foot for smoother movement. Additionally‚ verify that the fabric is aligned straight and not bunched. If the problem persists‚ consult the manual for specific adjustments or lubricate the feed dog area lightly. Proper maintenance and correct accessory usage can resolve most feeding issues effectively.
Maintenance and Care
Regular maintenance ensures optimal performance. Clean dust from mechanical parts‚ oil moving components‚ and store the machine in a dry‚ cool place for longevity.
Cleaning the Machine
Regular cleaning is essential to maintain your Lil’ Sew and Sew sewing machine’s performance. Turn off and unplug the machine before cleaning. Use a soft-bristled brush to remove dust and debris from the exterior and internal components. Dampen a cloth with water‚ but avoid soaking it‚ to wipe down the machine’s surfaces gently. Never use harsh chemicals or liquids‚ as they may damage the finish or harm electrical parts. For stubborn dust in tight spaces‚ use compressed air carefully. Avoid spraying directly into openings to prevent moisture buildup. Clean the bobbin area and tension discs regularly to ensure smooth thread flow. For polished metal parts‚ a microfiber cloth can be used to remove fingerprints and smudges. Cleaning after each use prevents lint and thread residue from accumulating. Consistent maintenance ensures your machine runs efficiently and lasts longer.
Oiling the Machine
Proper oiling is crucial for the smooth operation and longevity of your Lil’ Sew and Sew sewing machine. Always turn off and unplug the machine before oiling. Use high-quality sewing machine oil specifically designed for mechanical parts. Locate the oil ports‚ usually found near the bobbin area or on the machine’s side‚ and apply a few drops as directed in the user manual. Gently turn the handwheel to distribute the oil evenly. Allow the machine to sit for a few minutes to let the oil settle. Avoid over-oiling‚ as it can attract dust and cause residue buildup. Regular oiling ensures that moving parts remain lubricated‚ reducing friction and wear. For best results‚ oil your machine after every 10 hours of use or as needed. This simple maintenance step keeps your sewing machine running smoothly and reliably over time.
Storage Tips
Proper storage is essential to maintain the condition and functionality of your Lil’ Sew and Sew sewing machine. Always clean and dry the machine thoroughly before storing it to prevent dust buildup and moisture damage; Store the machine in a protective case or cover to shield it from dust and scratches. Place it in a cool‚ dry location away from direct sunlight and humidity. Avoid storing it in attics‚ basements‚ or areas prone to temperature fluctuations. Ensure the machine is unplugged and the power cord is detached to prevent accidental damage. For extended storage‚ consider placing silica gel packets nearby to absorb moisture. Regularly inspect the stored machine to ensure no pests or mold are present. By following these storage tips‚ you can preserve your sewing machine’s performance and extend its lifespan.
Additional Resources
Explore official Lil’ Sew and Sew resources‚ including tutorials‚ manuals‚ and community forums‚ to enhance your sewing experience and troubleshooting skills effectively online.
Online Tutorials and Videos
Access a wealth of online tutorials and videos designed to help you master the Lil’ Sew and Sew sewing machine. These resources are perfect for visual learners‚ offering step-by-step guides for setup‚ basic operations‚ and advanced techniques. Many tutorials are available on platforms like YouTube and the official Lil’ Sew and Sew website‚ covering topics such as threading‚ bobbin installation‚ and stitch selection. Additionally‚ video guides provide troubleshooting tips for common issues like thread breakage or uneven stitching. Whether you’re a beginner or looking to refine your skills‚ these videos offer invaluable insights and demonstrations to enhance your sewing experience. They are updated regularly‚ ensuring you stay informed about the latest features and best practices for your machine.
Downloadable Manuals
Downloadable manuals for the Lil’ Sew and Sew sewing machine are readily available online‚ providing convenient access to detailed instructions and guides. These manuals are typically in PDF format and can be downloaded from the official Lil’ Sew and Sew website or authorized retailers. They include comprehensive information on machine setup‚ operation‚ maintenance‚ and troubleshooting. Model-specific manuals ensure compatibility with your exact sewing machine‚ whether it’s the LSS-202‚ LSS-505‚ or LSS-338. These guides are free to download and serve as an excellent resource for both beginners and experienced users. Many manuals are searchable and printable‚ making it easy to reference specific sections. Additionally‚ downloadable manuals are often available in multiple languages‚ catering to a global audience. Regularly check for updated versions to ensure you have the latest information and guidelines for your machine.
Community Support and Forums
Community support and forums provide valuable resources for users of the Lil’ Sew and Sew sewing machine. Online forums dedicated to sewing enthusiasts offer a space to share tips‚ ask questions‚ and learn from experienced users. These communities often include discussions about troubleshooting‚ project ideas‚ and maintenance tips specific to the Lil’ Sew and Sew models. Many forums are free to join and provide access to a wealth of knowledge from sewists worldwide. Additionally‚ social media groups and specialized sewing communities can connect you with others who own or use Lil’ Sew and Sew machines. Engaging with these platforms fosters creativity‚ problem-solving‚ and a sense of belonging among users. Active participation in these communities can enhance your sewing experience and help you make the most of your machine.